Couple of tips for getting the pictures:
-Use a tripod- that way it's easier to make sure everything will line up right in the editing.
- If your subject is running/walking you want to close down your AP (higher number) so you make sure you are getting more in focus. I didn't do it and as a result (and you can see in the photos) the gate was in focus and because my son was far enough ahead of it he isn't quite sharp. It's hard to get the focus on your subject when they are running in front of you because you want to keep your camera in the same spot to make this type of composition work- and I know for me I can't change my focus points fast enough to keep up with him.
- Do several tries - just to make sure you get a good progression.
Editing:
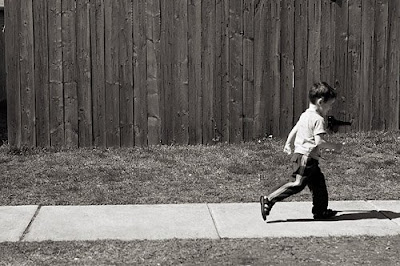
I shoot raw so the first thing I do is look at my photos in bridge and then open all of the ones I want to open in Adobe Camera Raw. There I make sure they are all selected so that I know they will look the same with their WB and Exposure. Then I open them in PS. Then I do a general edit on each picture - on this example I turned them all B&W. Here's the photo that I want at the end of the series:
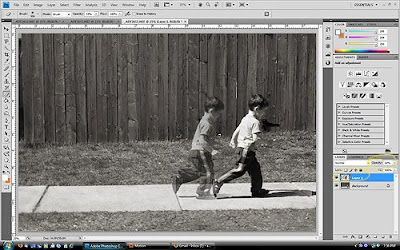
 Then I drag another photo using the move tool (top tool on the left toolbar) onto this photo. It puts it on a layer on top- as you can see in the lower right on the layers menu. I lower the opacity to where I want it and try to line up the photos as best I can. So I try and make sure all the lines in the fence and sidewalk are right on top of each other. With the new photo layer selected I erase (with eraser set to 100% and a soft edge) everything but the subject. For these ones I went from darkest to lightest (right to left) so this one still had a high opacity.
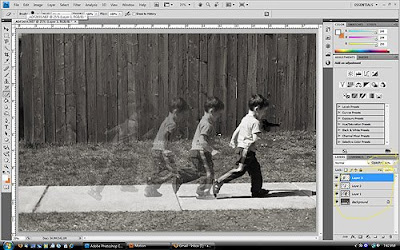
 Then I dragged two more photos and did the same thing as described above - now I have four boys on four layers. Each with varying opacity and all but the first layer with just the boy showing.
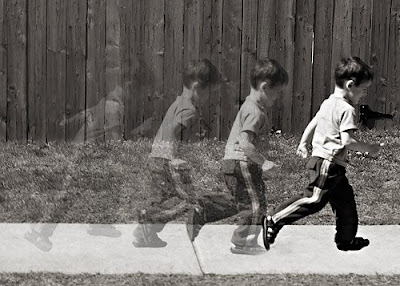
 Then I just flatten the image (ctrl+E) and do my finishing edits. For this I fixed the shadow and did some sharpening as I had already changed to b&w. Then I changed size and saved for web and you're done!


5 comments:
So cool! I'm going to have to try this sometime!
This is SOO cool! I totally want to try it as soon as I can!
These were great instructions, thank you!! I am going to have to do some RAW research and get a tri-pod!!! Wow, I STILL LOVE THIS PICTURE!!
Can't wait to try it!
I feel so much better now that I know how you did this... it's honestly been making me a little crazy for weeks! : ) Thanks so much for sharing!
Post a Comment