 To make the future better... these are my new shopping bags I use when I go shopping anywhere and everywhere!
f/1.8, 1/160, ISO 125
 To make the future better... these are my new shopping bags I use when I go shopping anywhere and everywhere!
 What camera do you use?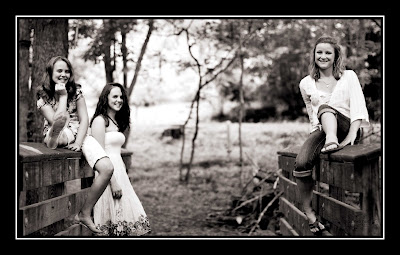
These are my two handsome men. I love them so much!

This is my best friend, Amy, she says this is going to be on an easel at her funeral saying that this is her, running into heaven! :)

 This is the sign that Mommy's run enough errands and it's time to go home and put the poor little boy to bed.
 Some of you know that today was my first wedding and it was so Amazing, Alive, and several more A words, I'm sure. One thing I really tried hard to do was to Abandon the traditional, tired shots. This one of the girls jumping was one of my very favorites of the 900 or so I took. Wow, I'm tired. It was a fantastic day! :)
 This is my cousin Carrie's little boy, Aidan, he's always such a happy little boy. Just makes you want to kiss him all the time. :)
 This portrait of my sweet Noah shows his personality perfectly. He has the sweetest laugh and grin where he shows all his teeth while scrunching up his little nose. I love it.
 I love old farm equipment. You probably already know this. Today we visited with some great friends of ours and they live on a huge farm full of cool old stuff. It was a great day.
 This is the display of flags at the Airborne and Special Operations Museum here in Fayetteville in honor of Memorial Day. Each flag represents a Hero's life lost in war.
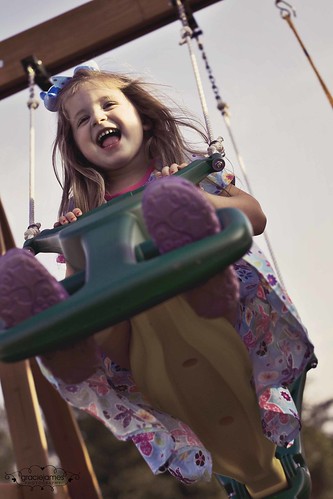 My sweet girl was fluidly swinging to and fro all evening long...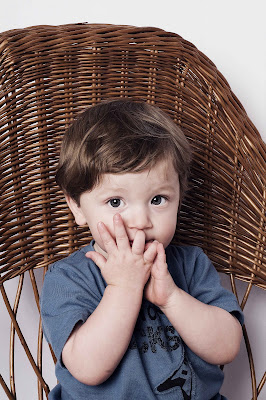
Taken Using the Rule of Thirds...
2) The "Sun Over Your Shoulder" Rule is Bogus.
You might have heard of this rule which says that you should always have the sun over your shoulder, or behind you so that the subjects faces are always lit. This, however, is pretty much the worst thing you can do. It pretty much guarantees that they'll be squinting and this is the last thing we want. Right? Right. It also causes them to have harsh, direct light bolting right down onto them. Instead, he says to try to keep the sun behind them, so that there's a flattering rim of light around them. Then you can use a tiny amount of flash to put just enough light on their faces to help compliment the natural light that's around them.
Also (this is totally me, NOT Scott Kelby), if you shoot with the sun behind your subject, you can catch one of my very favorite things.. sunflare!!!


3)Shoot Profile Shots in Horizontal
The reason you never want to shoot a profile shot in vertical is because they look boxed in and this tends to be uncomfortable to the viewer.
Here's that adorable little boy again. I don't know who he belongs to, but he should totally be a model for Gerber... ;)
See how this just looks wrong, but still... incredibly cute? ;) You just don't know who or what he's looking at. It looks like he's looking at the walls of a box.

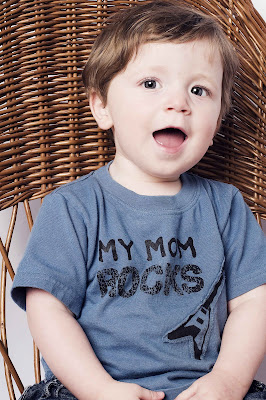
When you shoot a profile shot in horizontal, it gives the subject more breathing room and they just look more comfortable within the frame... And... just in case you're curious about what that little bundle of sweetness is looking at... it's my dad.
4) Trendy Composition Tip
Turning your camera at an angle is a very popular technique right now. I love to do it. I was hesitant to post the picture below, because I was thinking.. hmm.. I may be breaking the number one rule in this one (too much headroom), but I think I just did pass with getting her eyes into the top third. ;)
Since most portraits are taken in either horizontal or vertical, doing something different like angling is always fun and... different!! :)

5) Cropping off the Top of Their Head
This is going a step farther than not leaving too much room above your subject's head. This is a very popular pro technique that fills your frame with your subject's head. Kelby says that although it's perfectly fine to cut off the top of the subject's head, side of the arms, shoulders, hair, etc., you should never cut off their chin. People are used to seeing shots where the top is cut off, but the chin being cut off is a very uncomfortable composition.
And I had to squeeze in a picture of my sweet girl... her brother's been featured five times already. Gotta give a girl some exposure...
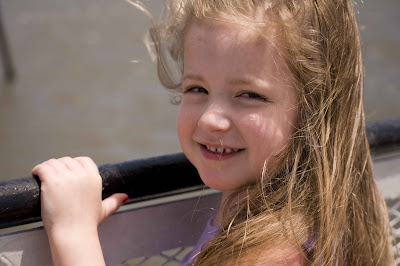
And here's my best friend and fellow photog, Amy, again... isn't she so beautiful?

6) Tip for Posing Group Portraits
The next time you go to pose a group of people for a portrait, instead of lining them up, try having them gather around and object or on a couch or chair. You'll find that they'll naturally arrange themselves around it or on it.
Also, for a more compelling group shot, put your subjects in a tight pyramid shape. Try to make sure they're all touching... arms around each other... heads really close together. It gives the shot a more fun-loving, casual look, and also provides a sense of energy and fun to the shot.
7) When Using Window Light
Positioning the Subject: The most beautiful light for portraits is the window light from a north facing window. The window acts as a diffuser and the larger the window, the more soft and diffuse the light is. You should position your subject with their shoulder facing the window... so that the light comes across them and creates soft shadows on the far side of their face.
Where You Should Shoot From: You want to be pretty much up against the window, shooting at a slight angle back towards your subject. Your subject should be about 6 feet or so away from the window.
Okay, this is where I'm going to end this tutorial. I feel like it's already gotten a bit long and drawn out. Sorry if I've bored you to death. Scott Kelby offers up many more suggestions in the book on how to shoot portraits like a pro, but these are the ones that really stuck out as being the most important to me.
And for the sake of not plagiarizing...
The Digital Photography Book Volume 2, Kelby, Scott, Peachpit Press, December 2007. Chapter Three. Pages 71-100.
All Images were taken by me. :)
 I love wreaths. My front door always reflects the changing of seasons with a new one. When I saw this one out shopping a few weeks ago, I knew it was just made for me. I love how the main circle part is just brown stick-like branches (isn't that a sophisticated term?) and the front is little white blossoms. I love it. :)
 Here's my sweet baby boy giving evil a kiss. :) His good daddy was there to protect him, though.



 Posts
All Comments
Posts
All Comments


